Tuesday, February 23, 2010
Pinecrest Pub Taking Shape
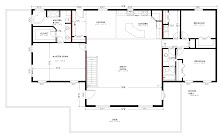
Construction of the Pinecrest Pub has officially started. When finished it will have 4 different beers on tap, a full compliment of liquors, sodas, wines, and a built in ice-maker.


Upgrading the Wood Stove
After a year and a half of service, our Blaze King gave up the ghost. The intense heat that is created by having a constant fire fueled by pine finally caused the welds to split inside the stove. This left us without any ability to damper the fire and caused a tremendous amount of heat loss up the chimney. After doing some research online I stumbled across the Montana Stove Works website. Truthfully, I found a review of their Cera Stove and then had to search for them. Here is the website for those that are curious: http://www.montanastove.com/ The direct link to the Cera stove is here: http://www.montanastove.com/page12.html
The owner/operator is Fred Seton and he's been building Boilers and wood stoves for 30 years. And as a bonus he is in Montana (Troy). After reading through his website, reading the reviews online, and then finally talking with him, Kelly and I decided to spend the $2600 to purchase the Commercial version of his Cera Stove. He claimed that it would put out enough heat to shut off the furnace. That's a pretty tall order here given the size of the place but he insisted that it would not only do it, but that we would have to give up splitting our wood too!! Woohoo!! The stove has a huge firebox and can take 15" diameter logs around 24" long. The firebox isn't iron like we are used to. It is actually framed with iron, and then poured with a concrete type material that they call "ceramic refractory". The end result is that you end up with a firebox that can withstand at least twice the heat of iron and it has a tremendous thermal mass that will continue to radiate heat even after the fire is out. This is exactly why the Vermont Castings Soap Stone stoves are so popular (and expensive). Another benefit of the construction is that the higher firebox temperatures actually prevent creosote buildup due to a more complete combustion. There are a bunch of fancy words that describe this but the end result is that your risk of a chimney fire is much reduced.
Three weeks later the stove showed up. 785 pounds!! Made moving it interesting and getting it up onto the hearth a bit of a chore. Luckily I have a couple of buddies that are always willing to lend a hand. Pete and Bob helped us make quick work of the stove install and in no time, the house was warming up. Fred wasn't kidding either. Before Kelly and I got it figured out we had the upstairs roasting at 77 degrees. The only time our furnace runs now is when it's really cold out and we decide to sleep in too long.
A special thanks to Pete, Sandy, Bob, and Erna for helping with the install and thank you Fred. Your stove has more than delivered on your promise.
Here's the finished product, and the pictures below it show how we got here.


The owner/operator is Fred Seton and he's been building Boilers and wood stoves for 30 years. And as a bonus he is in Montana (Troy). After reading through his website, reading the reviews online, and then finally talking with him, Kelly and I decided to spend the $2600 to purchase the Commercial version of his Cera Stove. He claimed that it would put out enough heat to shut off the furnace. That's a pretty tall order here given the size of the place but he insisted that it would not only do it, but that we would have to give up splitting our wood too!! Woohoo!! The stove has a huge firebox and can take 15" diameter logs around 24" long. The firebox isn't iron like we are used to. It is actually framed with iron, and then poured with a concrete type material that they call "ceramic refractory". The end result is that you end up with a firebox that can withstand at least twice the heat of iron and it has a tremendous thermal mass that will continue to radiate heat even after the fire is out. This is exactly why the Vermont Castings Soap Stone stoves are so popular (and expensive). Another benefit of the construction is that the higher firebox temperatures actually prevent creosote buildup due to a more complete combustion. There are a bunch of fancy words that describe this but the end result is that your risk of a chimney fire is much reduced.
Three weeks later the stove showed up. 785 pounds!! Made moving it interesting and getting it up onto the hearth a bit of a chore. Luckily I have a couple of buddies that are always willing to lend a hand. Pete and Bob helped us make quick work of the stove install and in no time, the house was warming up. Fred wasn't kidding either. Before Kelly and I got it figured out we had the upstairs roasting at 77 degrees. The only time our furnace runs now is when it's really cold out and we decide to sleep in too long.
A special thanks to Pete, Sandy, Bob, and Erna for helping with the install and thank you Fred. Your stove has more than delivered on your promise.
Here's the finished product, and the pictures below it show how we got here.
Sunday, September 27, 2009
Staining and Sealing the House
With Winter fast approaching we had to get the house stained and sealed. To get this done we rented a towable manlift and Kelly sweet-talked Butch into coming back up and helping for a week. Our buddy Vince loaned us a sprayer to make the application go faster too.
Kelly made the most of the time that I was at work. Her and Butch managed to do almost the whole house before I was able to get home and take over. I'm pretty lucky to get to work with these two.
The Stain we used was included with the package from Paramount Log Homes. It is made by Sashco and is widely regarded as some of the best stuff ever made for log homes. The stain is called "Capture" and we elected to get the lighest color they had to preserve the look and color of the logs in their natural state. The sealer is also made Sashco and it's a fancy clear coat that leaves a glossy finish on the logs. This stuff is spendy but the end result is worth every penny. I can see why Ray uses this stuff.
We ended up putting one heavy coat of stain almost everywhere but there were places that required two coats. The sealer went on very fast after that and one coat looked about right. To apply it we used the sprayer (airless sprayer made by campbell hausfield) to apply it to the logs/trim and back-brushed it with some large brushes. We used cardboard to guard the windows while we sprayed around them. We would always wash the windows afterwards but the cardboard made the cleanup lots quicker. There are lots of pictures below that show how it turned out. Thanks again to Butch and Kelly.
____________________
________________
__________
_____________
Tuesday, September 1, 2009
Hammerhead
What would be the last thing you would expect to see hanging up in a log home in Montana? How about 10' long Hammerhead shark?
Ours finally arrived from the taxidermist in Florida. They did a great job on it and it really looks like a fish out of water on that big log wall! It's one heck of a conversation piece. And for the record, it's not quite 10' long, it's 9'-8" long. Weight was estimated at 450lbs. Finally proof that I caught a fish bigger than me.


Ours finally arrived from the taxidermist in Florida. They did a great job on it and it really looks like a fish out of water on that big log wall! It's one heck of a conversation piece. And for the record, it's not quite 10' long, it's 9'-8" long. Weight was estimated at 450lbs. Finally proof that I caught a fish bigger than me.


Tuesday, July 14, 2009
Garden Spot
Kelly has wanted a garden at every house we have owned so far and so far I have let her down on the last three. It was time to make that change.
My Neighbor Bob was wanting to start construction at his place so we came up with a plan to get an excavator out there. My contacts didn't work out so well so Bob suggested renting a backhoe instead. To make a long story short, that's exactly what we did and three of us ended up splitting the rental. We spent the better part of three days excavating for Bob's house and shop, then I started on our garden spot. The plan was to make a rock retaining wall and then fill it with topsoil.
I gathered all the rock I could at Bob's while he was running the backhoe. Kelly and I stacked it up pretty quickly but it was really easy to tip over once it got over about 15' long so we used the backhoe to move all the boulders we had into the wall line. That helped it a lot. Then we filled in the gaps. Kelly took the new 4-wheeler and snowmobile trailer and gathered more rock around the land. I used the backhoe to gather rock and mine topsoil.
Once we saw how rocky the soil we had was we called to get a price on topsoil. It was almost $400 a truck!! Yeah right!! I'm too tight to spend that kind of dough on dirt so we started mining it again. The girls would ride with me for an hour at a time. I ended up making about 60 trips from the bottom of the hill to the garden spot and I burned about 20 gallons of diesel making it happen but it's done now. Enjoy the pics.
Somehow we got started without taking any good before pictures.


With all of the tractor work done it was time to start tilling. That took some time to arrange since we don't own a tiller. My In-Law's donated two to the cause. One needed some work and the other was a "Mantis" tiller that is an awesome machine for making the seed rows. My folks ended up giving us their old tiller in the hopes that we could fix it and use it. When they quite using it we were all under the impression that the motor was shot. It was stored under their steps for the better part of 10 years without an air cleaner or spark plug in it. I picked up a plug, poured a little oil on top of the cylinder and hoped for the best. I tried to start it the next day and on the first pull that old briggs fired off and we were in business.


To say the least the garden has taken off. These pictures were taken this morning. It takes some water to keep it all going the right direction but I think that we are going to have some excellent produce this fall.


My Neighbor Bob was wanting to start construction at his place so we came up with a plan to get an excavator out there. My contacts didn't work out so well so Bob suggested renting a backhoe instead. To make a long story short, that's exactly what we did and three of us ended up splitting the rental. We spent the better part of three days excavating for Bob's house and shop, then I started on our garden spot. The plan was to make a rock retaining wall and then fill it with topsoil.
I gathered all the rock I could at Bob's while he was running the backhoe. Kelly and I stacked it up pretty quickly but it was really easy to tip over once it got over about 15' long so we used the backhoe to move all the boulders we had into the wall line. That helped it a lot. Then we filled in the gaps. Kelly took the new 4-wheeler and snowmobile trailer and gathered more rock around the land. I used the backhoe to gather rock and mine topsoil.
Once we saw how rocky the soil we had was we called to get a price on topsoil. It was almost $400 a truck!! Yeah right!! I'm too tight to spend that kind of dough on dirt so we started mining it again. The girls would ride with me for an hour at a time. I ended up making about 60 trips from the bottom of the hill to the garden spot and I burned about 20 gallons of diesel making it happen but it's done now. Enjoy the pics.
Somehow we got started without taking any good before pictures.
Kelly did all the hard work though. She tilled and raked rocks for over a week. These pictures will give you some idea of how many rocks were in that "topsoil" that I mined. She's still cussing me. After the majority of the rocks were gone she hauled a load of manure in from the local feedlot. After shoveling it all out she tilled at least twice more. Then I got to do some fencing. 6' tall woven wire. The posts were 8' tall so starting them was interesting. I think I'll go for the shorter ones when we fence the rest of the land.
To say the least the garden has taken off. These pictures were taken this morning. It takes some water to keep it all going the right direction but I think that we are going to have some excellent produce this fall.
Subscribe to:
Posts (Atom)